Digital audio workstations handle the arranging, editing, and cleanup. Studio B’s hardware is where the track usually gets its identity.
In practice, that means picking one machine, getting one part right, and printing it. A Little Phatty bassline, a JX-3P chord pass, a TD-3 loop with the filter moving, a Wavestation layer behind the chorus. The DAW keeps the session organized. The hardware gives you something worth committing to.
At The Music Company, artists can access Studio B for $25 per hour for individuals and small organizations and $75 per hour for institutions. The room is part of TMC’s 501(c)(3) nonprofit mission to provide affordable professional music workspaces, education, and creative access in San Diego.
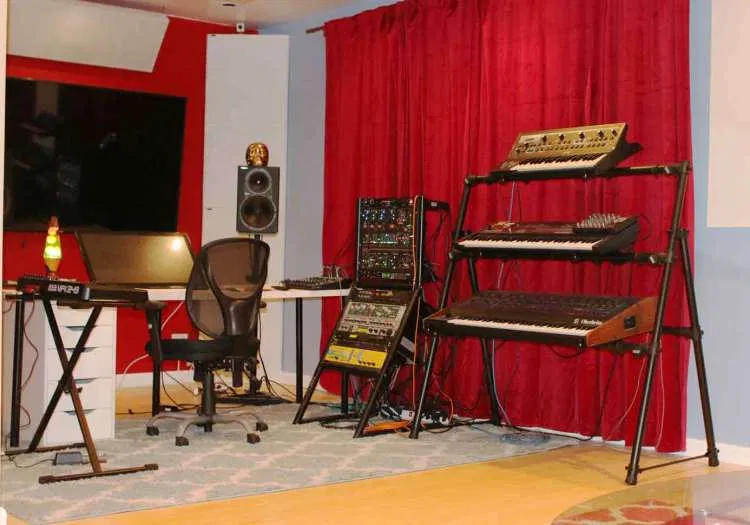
Studio B includes the actual synth and production equipment listed on the room page: Roland JX-3P, Roland JD-XI, Roland PG-200, Roland TD-3, Moog Little Phatty, Behringer B-2600, Waldorf MicroQ, Proteus Pop/Rock, Korg Wavestation, Korg Monotribe, Digitech 2120 Artist Valve Guitar System, Electrix Pro Filter Factory, and Kurzweil Mangler.
Why analog synthesizers still matter
Direct sound creation
In Studio B, the payoff is speed. You are not opening ten soft synth windows and comparing presets for half an hour. You reach for one machine and see quickly whether it belongs in the track.
The JX-3P is a good example. It does not ask for much theory. Patch it, hit a chord, and the chorus circuit does the rest before you reach for a plugin. If the part wants width and a little instability, you hear that answer right away.
The Little Phatty behaves differently. It gets to a usable bass sound fast, and once it is sitting with the kick, there is usually no reason to keep searching. Print the line, label it, move on.
Hands-on control
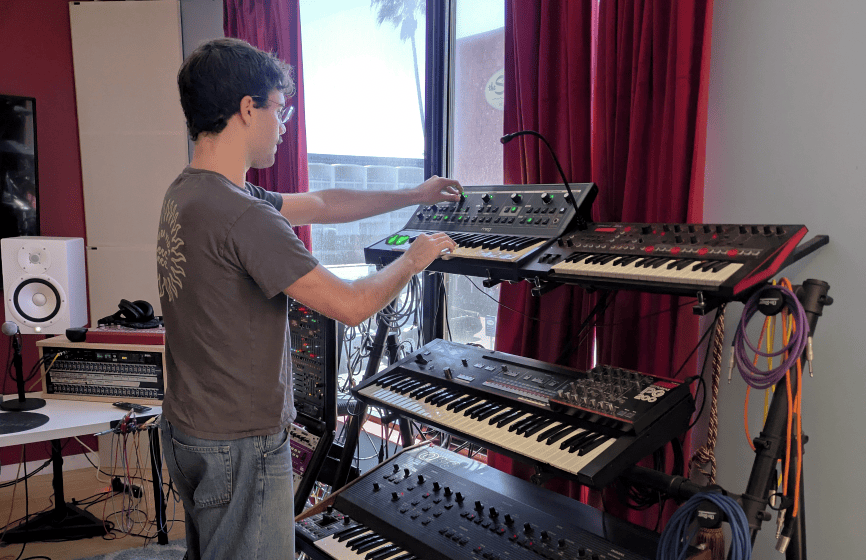
A lot of the useful movement in this room comes from touching the machine while it is running. Start a note, hold the chord, open the filter, back it off, change the shape of the part, then print that pass.
With the TD-3, this is the whole point. Let the pattern loop and work the cutoff and resonance until the line starts speaking the right way. With the JX-3P and PG-200, a small change can turn a flat pad into something that actually fills the section.
Focused creative limitations
Studio B works best when one machine has one job.
- Pick the part
- Pick the machine
- Get the sound into place
- Record it
- Decide if the track needs another layer
That keeps the session moving and usually gives better results than building five half-finished hardware parts at once. A printed bassline from the Little Phatty or one strong JX-3P chord pass will usually do more for the track than a stack of undecided options.
How hardware synthesizers work with a DAW
The basic Studio B move is simple: sequence or play the part, send the synth into the interface, and print audio when it starts feeling right.
That matters because a lot of the best moments happen on the hardware itself. A bassline gets better after a couple of filter changes. A pad only opens up once the JX-3P chorus is in the room. A TD-3 pattern turns into the part when you let it run and start pushing the filter.
For dance and EDM producers, the useful questions are practical ones:
- Part role: is this machine doing the bassline, the chord bed, the hook, the sweep, or the weird layer in the background?
- Single-note or layered: does the part want to stay lean, or does it need harmony and width?
- Movement source: is the motion happening on the hardware during the pass, or are you going to print a cleaner take and automate later?
- Timing check: if the part depends on a repeating pattern, arpeggiation, or tight sequencing, test that behavior in the room before you build the section around it.
Studio B supports that workflow with Logic, Ableton Live, and FL Studio, plus 18 inputs and 10 outputs, a MOTU 828x audio interface, a Raven MTi touchscreen production console, an Akai MPK249 MIDI controller, and a Novation Launchpad MIDI controller.
A practical split for this room:
- Little Phatty: bassline print
- TD-3: start a pattern, let it loop, and ride the filter and resonance while you audition or record the pass
- JX-3P: chord pass
- Wavestation: sustained pad or motion layer
- MicroQ / B-2600 / Monotribe: secondary texture, effects, or resample source
Practical ways to use analog synthesizers
1. Build a bass part
Start with the Moog Little Phatty and put the bassline against the kick right away. In this room, that usually tells you within a minute whether the line is doing its job or whether it is eating too much space.
Before committing, run the same part through two or three filter positions and listen back in the Studio B monitors. One pass may feel bigger on its own but disappear once the drums and top end come back in. Print the version that actually holds the low end in the track, not just the one that sounds biggest in solo.
2. Create a lead melody
The Roland TD-3 is useful here when the hook needs movement. Start the sequence, let it loop, and keep your hands on the cutoff and resonance while the line runs.
That is the move to record. The repeating phrase becomes the hook because the sound keeps changing while the pattern stays simple. If the timing feels good and the filter ride is doing the work, print that pass instead of planning to fake the motion later.
3. Add pads and sustained textures
For width, start with the Roland JX-3P, and if the Roland PG-200 is in play, use it to get the sound where it needs to be before recording. Hit the chord, listen to what the chorus is doing in the Studio B monitors, and give it a second before deciding. When it is right, the width shows up immediately.
If the part needs a steadier sustained layer underneath, bring in the Korg Wavestation. Hold the chord or long note, listen for the movement in the room, and print it once the layer fills the section without taking over the center of the mix.
4. Use short sounds as rhythmic elements
The TD-3 and Behringer B-2600 are both useful when the track needs a repeating figure or a transition that feels played, not pasted in. On the TD-3, build a short pattern, let it run, and change the sound while it loops until one section feels worth keeping.
On the B-2600, make a short figure or texture, keep it moving while you listen in context, and print a tight section once it starts locking with the groove. That recorded piece can carry a verse turn, a build, or a short break without needing to fill the whole arrangement.
5. Layer synthesizer parts with other instruments
A good Studio B combination is a Korg Wavestation sustained layer behind a Roland JX-3P chord pass. Print the JX-3P first, then bring the Wavestation in underneath and leave enough space so the JX-3P still reads as the main harmonic part.
The same idea works with a Moog Little Phatty bassline under another synth part. Let the Little Phatty own the low end, then keep the second part out of its way. If there are vocals, guitars, or acoustic parts later, this approach also leaves room for them instead of forcing everything to compete in the same range.
6. Resample and process the audio
Once a TD-3, JX-3P, Wavestation, Little Phatty, or B-2600 part is printed into the DAW, that is where the second round of ideas usually starts. Cut a phrase, repeat one hit, reverse a section, or pull one bar out for a transition.
If the session wants more treatment, the recorded audio can also be routed through available gear such as the Electrix Pro Filter Factory or Kurzweil Mangler, then brought back into the DAW as a new print. The useful habit is to keep the original hardware pass and the new processed version clearly labeled so you can keep moving without losing the source.
Working with Studio B synthesizers at TMC
TMC’s Production Suite in Studio B includes access to a specific mix of older and newer production hardware. The point is not to label everything vintage. The point is to know what each piece actually does in the room.
The Studio B equipment list includes:
- Roland JX-3P
- Roland JD-XI
- Roland PG-200
- Roland TD-3
- Moog Little Phatty
- Behringer B-2600
- Waldorf MicroQ
- Proteus Pop/Rock
- Korg Wavestation
- Korg Monotribe
- Digitech 2120 Artist Valve Guitar System
- Electrix Pro Filter Factory
- Kurzweil Mangler
Precision matters here:
- Older / vintage-era pieces: Roland JX-3P, Korg Wavestation, Roland PG-200
- Later or modern pieces: Roland JD-XI, Roland TD-3, Korg Monotribe, Moog Little Phatty, Behringer B-2600, Waldorf MicroQ, Proteus Pop/Rock
- Effects/processing: Digitech 2120 Artist Valve Guitar System, Electrix Pro Filter Factory, Kurzweil Mangler
The most immediate room-specific payoff is the Roland JX-3P with the PG-200. The chorus on the JX-3P is the kind of sound that makes sense as soon as it comes through the monitors. It is not subtle in the room. A plain chord becomes wide and slightly unstable in a useful way, and that usually prints better than a cleaner soft synth patch when the track needs space fast.
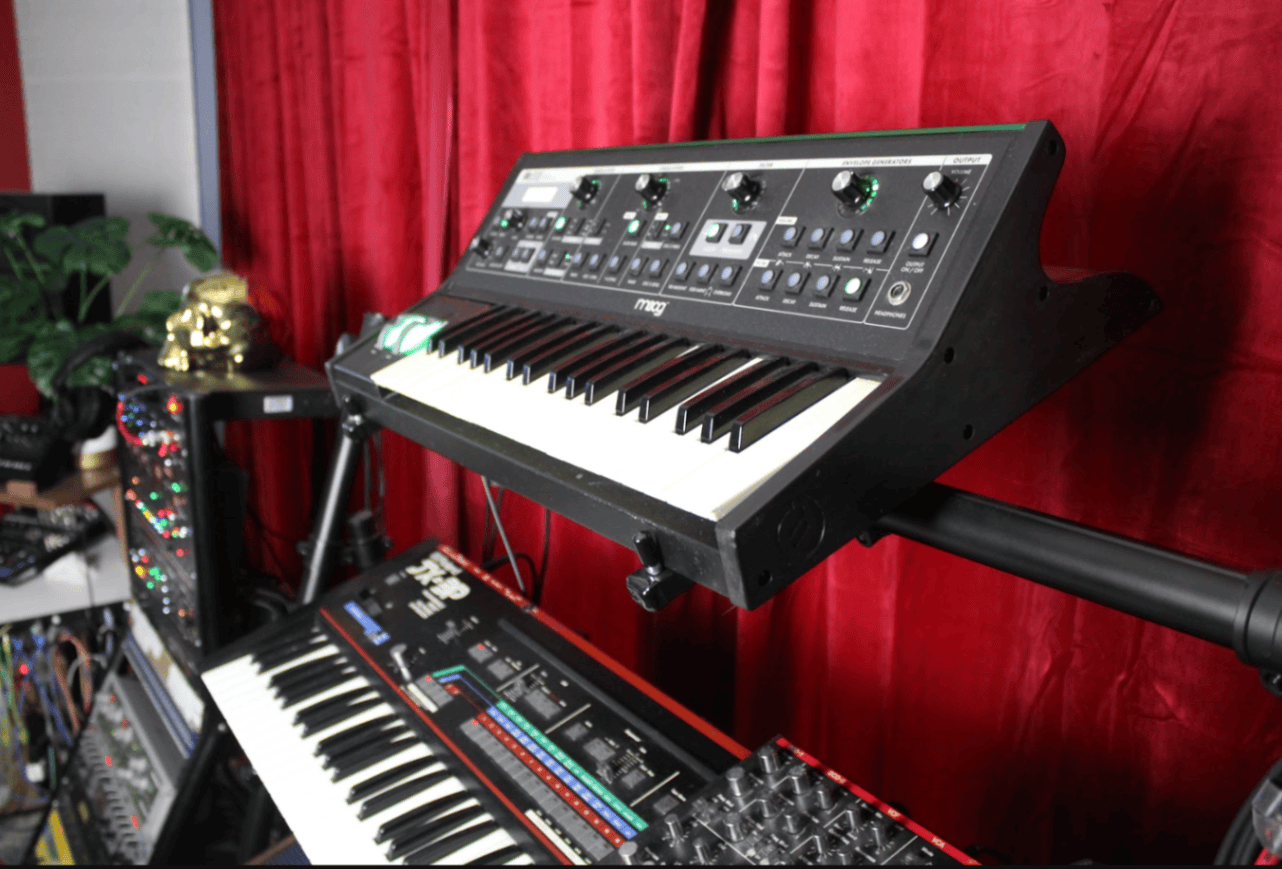
The Moog Little Phatty is a strong bassline machine in this setup. It is fast to dial, sits in the center of a mix without much correction, and works well when the session needs one solid mono part rather than a larger layered patch. In Studio B, that usually means getting the line right, printing it, and moving on.
The room rewards simple decisions. Use one machine for the bass part, another for the chord layer, another for texture if the track still needs it. Print the pass into the session, listen back, then decide whether the arrangement needs one more color or whether the part is already doing its job.
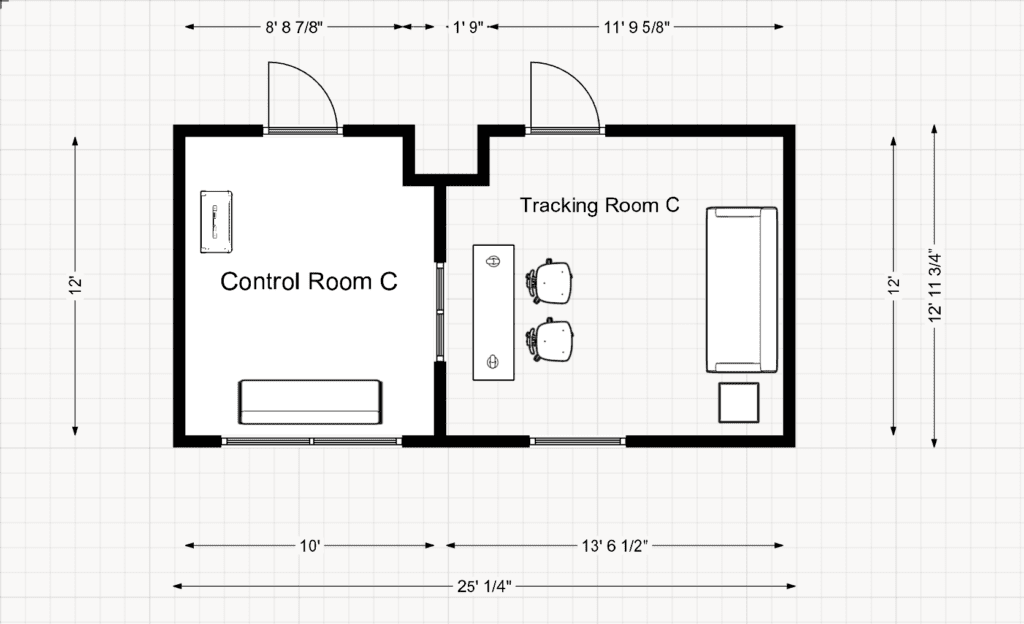
The room also includes professional monitoring, MIDI controllers, microphones, instruments, amplifiers, and production equipment. Studio B measures 348 square feet and has a maximum capacity of eight people.
Studio B hardware session checklist
This room goes better when the first 10 minutes are deliberate. Most lost time comes from three things: latency, clocking, and forgetting the sound after teardown.
Before the session
Bring:
- Your laptop, if you want to use your own computer
- An external drive for pulling/backing up session files from studio computers post-session
A good first call is usually obvious:
- Little Phatty for the bassline
- JX-3P for the chord pass
- TD-3 for the looping pattern
- Wavestation for the sustained layer
If the room opens and you still do not know what you are printing first, that is usually where the hour starts disappearing.
First checks in the room
Before the full take:
- Get signal into the MOTU 828x.
- Check the monitoring path and use the setup that lets the performer play in time.
- Record a short pass.
- Zoom in and check the recorded audio against the grid before committing to the full performance.
This is the boring step that saves the session. Losing a strong take to monitoring latency is avoidable if you test it early.
If the part is sequence-based, test timing before the arrangement depends on it. With the TD-3, verify the connection first, decide which device is acting as the clock source, make a short loop, and check that the pattern starts and stays where expected. If anything feels loose, fix that before writing the whole section around it.
While printing parts
Work one role at a time.
- Little Phatty: get the bassline sitting with the kick, then print it.
- TD-3: start the pattern, let it loop, and change cutoff and resonance while you audition or record the pass.
- JX-3P: hit the chord, listen to what the chorus is doing in the monitors, then print the pass before overthinking it.
- Wavestation: build the sustained layer, print it, and decide later whether it stays full-length or gets chopped into sections.
- MicroQ / B-2600 / Monotribe: use them for edge, motion, noise, transitions, or resample material once the core parts are already in place.
Decide whether you want a dry hardware print, a processed print, or both when the routing permits. Label the audio clearly so the next person opening the session knows what can be reprocessed and what is already committed.
Useful track labels:
Little Phatty Bass DryLittle Phatty Bass WetTD-3 Filter PassJX-3P ChordsWavestation Pad Print
Before teardown
Do not trust memory. Photograph the panel or write down the final settings before disconnecting or repatching. Not every instrument in the room should be treated like it has deep patch recall, and it is painful to know the sound was right and not be able to get back to it.
Then:
- Save the DAW project
- Export a reference mix if needed
- Back up the session
- Keep the notes with the project
That is usually enough to come back later without having to rebuild the whole sound from scratch.
Access professional equipment through TMC
The Studio B Production Suite is available for:
- Music production
- Demo recording
- Electronic music
- Podcast production
- Radio shows
- Livestreaming
- Editing
- Mixing
- Mastering
- Artist development
Artists may book the room directly or review the Studio B Production Suite page for current details.
Bring an existing project, start a new track, or use the available synthesizers to develop a sound from the beginning.
Related posts

How To Make Your First Mix
New to mixing music? Well, we are so glad you found this page! Welcome to TMC’s beginner-frien …